
Hiya! Welcome to Daddy's Little Corpses' first installment of "DIY or Buy"!
Being the obnoxiously kind of crafty corpse that likes to figure out how to make something her own way and on the super cheap (cheap being the haunters best friend next to a role of duct tape), I tend to dissect things that I see in the stores and want, but don't want to spend or can't spend the money on. Enter "Demon Peepers"...
Every Halloween I see those battery-powered evil eyes sets that suction to your window. We've had a couple sets in my family. My mom had a pair that she'd put in the back window of her mini-van. The suction cup worked after a few uses, but usually the weight of the battery pack won out (or Mom simply hit a pothole-- not exactly a common problem with these for most, just weirdos like us) and the eyes would crash to the ground, more than likely cracking something important rendering it garbage. Well, unless you were my mom, of course, who would more often than not wrap it in duct tape till it worked again and then fuse it up semi-permanently with some vaseline-like substance an element short of super glue.

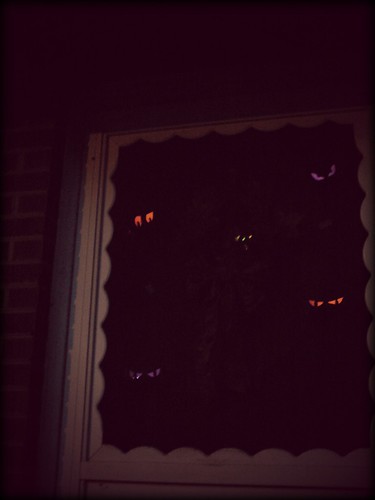
While "evil eyes" are cute and they serve the admirably simple purpose of providing quick and eerie ambience for that one awesome night out of the year... they cost money. Anywhere from $3-$5 each or a pack of 3 for $16 is the latest I've seen in stores. If you want a yard full of eyes it can get costly quick and frankly, the blinking lights get old. There's something so much more unnerving about an unwavering stationary glow of eyes peering out at you from a window, from under the bed or from those massive, unruly azaleas in the front yard. You know the ones that you've barred your parents from trimming, because their wild unruliness is Halloween perfection....?
What? that isn't just me?!
I've done a few different versions of random glowing evil eyes over the years. It's a good subtle filler project to freak out the knee biters with, but I've never been entirely happy with it. I've tried soup cans with tea lights (or glow sticks) with eyes punched in with a old fashioned can opener (not bright enough, no eye variation or practical for trees at all, etc), film cannisters on christmas tree lights with pin-prick eyes (I try to avoid extension chords and placement sucks anyway), or throwies strategically placed (more $$ than it's worth)... and more often than not I think it just looks cheesy, but cheesy is my favorite thing to use to throw off the neighbors in the weeks leading up to Halloween. A little diversion never hurt anyone OR their haunt...
This version of my make-shift evil eye, is a very forgiving, (and, dare I say?) "kid friendly" project. Great for last minute decor, those with limited space (excellent for a balcony or apartment window!) or even a creepy little night light for the little ghouls out there who need it. Best of all, with the exception of your chosen light source, it's made from materials everyone has already in their home!

Demon Peepers
Supplies Needed
-toilet paper or paper towel tubes
-scrap cardboard (raid that paper recycling bin!)
-pencil (or pen/sharpie)
-small sharp scissors/exacto knife
-hole punch (optional)
-black paint and brush
-tape (masking tape or duct tape best)
-fishing line (black thread/twine/wire)
-scotch tape
-glow sticks/battery operated tea lights/throwies
-color cellophane (optional)
-aluminum foil (optional)
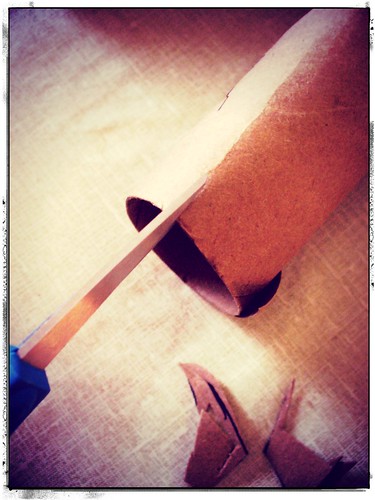
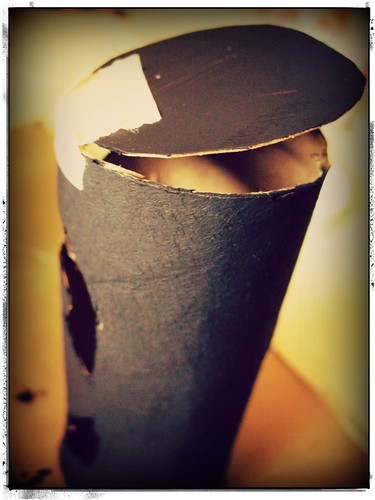
Step One: Gather your supplies and begin by trimming down any paper towel tubes to size if necessary. You can get about two demons from one roll that will fit a mini-sized glowstick. Any smaller than toilet paper sized, glowstick jewelry or throwies are better options.
Step Two: Draw out your eyes-- no need to be perfect on this. I know I wasn't! If you're lacking inspiration for your demons eyes, simply google some jack-o-lantern templates.
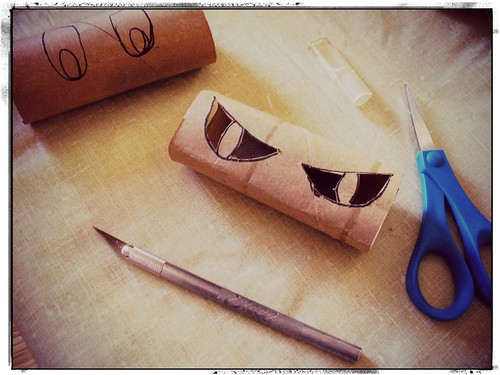
Step Three: With the hole punch (best for little fingers) or your exacto/scissors, make a starter hole in the negative space of the eyes (the bits you're cutting out). Slip your scissors in the hole and cut out your eye. Again, it doesn't have to be perfect. Don't stress!
Take stock of frayed cuts or unraveling bits of your tubes. The toilet paper tubes are especially finicky once you start to cut them. Simply tape the edge down with a bit of masking tape. Don't worry, we'll be painting over it later. Nobody will see!

Step Four: Using the ends of your tube as a template, trace out two circles (per tube) on the scrap cardboard. You can also use black posterboard. Cut out your circles.
Step Five: Cut two slits on top of the roll, one on each end for your fishing line (twine/thread/etc). You can thread now or after step six... though threading does give you something to hold onto while painting and you can hang your tubes while they dry.
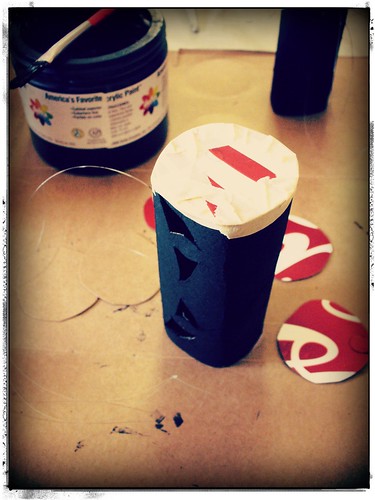
Step Six: We're now ready to paint! I opted for black acrylic. It's easier to coat, quicker to dry and, spray paint has a tendency to dry a sort of greyish black on some cardboard, not to mention the stink sometimes sticks too. Also, when using spray paint on cardboard tubes, it mostly just blows it around. Make it easy for yourself, go acrylic! Whatever you choose, grab your paint and slather it on the outside of the TP roll. You can also paint your cardboard disc now too. Just one side'll do. Don't put your paint away yet though, you still need it!
Step Seven: When they're dry, if you haven't already, string with the fishing line or black thread. Take one of the pre-cut discs and tape it to the end of the TP roll. It doesn't have to be perfect, but it's a good idea to make it nice and tight so you don't get any light leaks! If you're using regular masking tape or duct tape (as opposed to black masking tape) paint over the tape with black paint. While you're at it you can paint the second disc! Let dry.
Step Eight: On the open end of your tube, attach the second circle with a small piece of tape. Reinforce it on the inside with another small piece to creat a hinge. Paint the outside piece of tape.
You're as good as done. You can add a piece of aluminum foil inside to help give a brighter glow if you wish. For the tea lights and even the throwies it may help for a stronger light, but if you're using the mini glowsticks I've found they are plenty bright. Also, if using tea lights or regular colored throwies you can also tape a bit of red (or any desired) color cellophane inside over the eyes, but again, the colored glowsticks saved that step!
Now, pop in that light source, tape the end shut with some scotch tape, hang your eyes and haunt away!
Indoors...
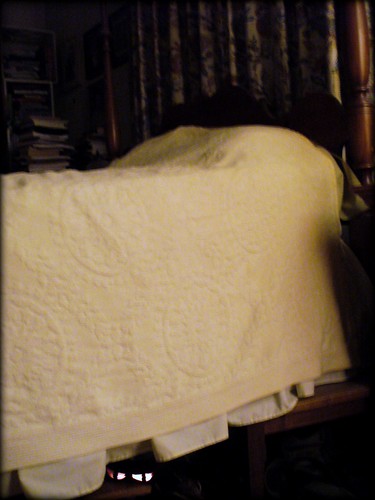
or out!
For a more involved, weather-proof and crush-proof version, use a piece of PVC piping in place of the TP tubes and buy the plastic capping for PVC found in the plumbing aisle. Drill, jigsaw, spray paint and wire required... a plastic pipe bomb with eyes!
Apologies for the length of this! Tried to use the insert jump break, but to no avail...
No comments:
Post a Comment